
TIE-TC 34: Encounter at Charybdis
Battle Information
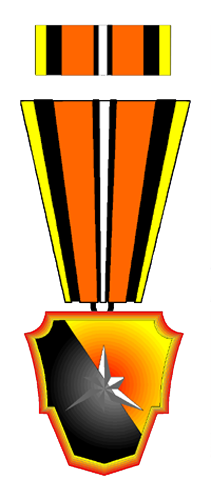
Battle Medal:
Medal of the Chromium Cloak
Battle Reviews
5
COL TheBlackxRanger
Reviewer's rating profile
2021-08-22
This was a fun mission, had everything to offer. destroying stations, ships, escorts, inspect and deliver. great battle, definitely recommend this one
4
COL Phalk Sturm
Reviewer's rating profile
2020-12-05
Solid planning, flawless execution, only minor details for improvement. This battle is an excellent 6 step to enjoy one of our cherished classics. It has it all, dogfighting, escort and interdiction. The T/D is always the pleasure for any pilot, and a guarantee you will come home in one piece. No one can beat the Space Cadillac. Great battle
4
LC SkyShadow
Reviewer's rating profile
2020-06-22
a lengthy but very enjoyable six mission battle. The plot starts off slow and simple but makes some interesting twists at the battle progresses. The briefings and officer text are well written and flow well. There is also plenty of in-cockpit comms text to keep the flow of each mission going however there were some grammatical errors here. The missions themselves were well enough made though at times felt quite linear as if I was being guided to do certain things and then at other times I felt like I was missing out on huge parts of the mission by trying to complete objectives. The missions present a good challenge.
A thoroughly good battle.
4
HA Anahorn Dempsey
Reviewer's rating profile
2019-08-07
Well thought out missions, nicely balanced when it comes to number and type of enemy craft, which makes it a very nice battle. The only thing I would like to see changed is the last mission: while I have no problem with a Secret Order only briefing, no Flight Officer *should* mean *no primary goals*.
4
AD Hav Antiel
Reviewer's rating profile
2014-08-17
The storyline made sense from mission to mission, including disabling some capital ships for use in the next mission. I really enjoyed the "cloaking" feature in the later missions; very cool!
1
LC Gen Es'mith
Reviewer's rating profile
2002-02-10
Maybe it's just me, but this is not an eminently flyable/winnable game for the average stick jock.
4
LT Adrian Tepes
Reviewer's rating profile
2001-11-10
This battle was pretty fun, but it can get pretty long in some places. As for that bug report, it isn't a bug, you have to complete the Secondary goals to win that mission... I was having the same problem, until I read the debriefing question. :P
4
LC Tempest
Reviewer's rating profile
2001-10-29
I agree with the others that this battle was very good. I only hated in some missions that you have to wait 3 or 4 minutes in the beginning before something happens. Although this might be realistic, it is a fun-killer if you play missions more than once.
5
LCM Kir Kanos
Reviewer's rating profile
2001-09-24
This is a must-fly. The desinger did a very good job.
5
COL Beef
Reviewer's rating profile
2001-05-09
This battle had an excellent plot and all the missions fit together smoothly. Each mission was complex and thorough (even remembered to add reinforcements where the story would allow). Fun challenge. Mission 3 was slow but a good idea.
Battle Bug Reports
2021-08-11
shows end of battle cut scenes and sends you back to concourse after mission four of six.
High Scores
| Battle Total: | 664,560 | CM LPhoenix | 2023-05-20 |
|---|---|---|---|
| Mission 1: | 52,256 | GN Andrzej Mezynski | |
| Mission 2: | 82,295 | GN Andrzej Mezynski | |
| Mission 3: | 85,973 | CM LPhoenix | 2023-05-20 |
| Mission 4: | 97,775 | CM LPhoenix | 2023-05-20 |
| Mission 5: | 123,433 | HA Daniel Bonini | |
| Mission 6: | 271,935 | HA Daniel Bonini |
Top Ten
(of available records)
| 1 | 664,560 | CM LPhoenix | 2023-05-20 |
| 2 | 612,402 | HA Daniel Bonini | 2004-09-21 |
| 3 | 595,721 | CM LPhoenix | 2023-05-02 |
| 4 | 543,953 | LC Rando | 2019-08-20 |
| 5 | 501,990 | MAJ Aldaric | 2019-06-15 |
| 6 | 491,052 | LCM Marlin | 2005-05-07 |
| 7 | 475,966 | CM Darius Hunter | 2004-08-05 |
| 8 | 450,658 | CPT Ras Kronar | 2003-05-26 |
| 9 | 443,371 | RA Colo Delste | 2022-03-31 |
| 10 | 431,302 | CPT SL8c8 | 2019-06-12 |
Battle Completion Statistics
This battle has been flown by 346 pilots a total of 375 times.
GN Abel Malik - 2005-02-17
MAJ Aeolus - 2002-08-14
SL Airamags - 2003-10-20
MAJ Aldaric - 2 times, last on 2019-06-15
LC Alec Qarni - 2003-08-20
SL Alejandro Araujo - 2019-12-06
LCM Aleksey Chugunov - 2003-10-29
CPT Alexi Stukov - 2003-11-18
HA Anahorn Dempsey - 11 times, last on 2021-05-13
LC andr3 - 2021-08-11
AD Apophis Kuma - 2003-01-07
COL Archangel - 2004-09-23
CM Armagon - 2003-12-09
COL Arso Slyth - 2003-06-10
CPT Atmos Myremod - 2002-12-18
FA Brukhar - 2004-07-04
LCM Brunon von Doom - 2003-03-19
LCM Charlie X - 2020-03-31
LCM Clarg Zethman - 2005-05-07
RA Colo Delste - 2022-03-31
FA Conker Blackwood - 2009-12-08
GN Coranel Both - 2 times, last on 2022-10-29
SL Corran Horn - 2002-09-03
COL CrimsonFury - 2005-01-26
LC Curtis - 2003-03-02
HA Daniel Bonini - 2004-09-21
CM Darius Hunter - 2004-08-05
CPT Death Angel - 2003-01-07
MAJ Deleted Member - 2020-09-16
COL Den Darkhill - 2003-03-06
MAJ Devin Taralis - 2003-01-14
LC Diaboli - 2005-03-16
CM Dirk Logan - 2003-06-08
COL Dirty Vader - 2004-07-20
LC Dolsar Saris - 2002-12-03
LCM Drax Remlinger - 2002-09-04
CM Dulcatos - 2005-03-15
GN Dunta Polo - 2011-02-09
GN Elwood the Brave - 7 times, last on 2021-04-08
MAJ Evo Sarnok - 2003-04-28
CM Fahrer - 2005-01-25
CPT Firzam Coldsteel - 2004-08-16
MAJ Flelm - 2014-09-16
LC Frey Gallandro - 2003-02-18
HA Frodo March - 2002-09-08
CM Ghorg - 2005-02-14
AD Gidda - 2002-08-13
GN Gilad Pelleaon - 2010-03-28
GN Golbez Harvey - 2015-06-28
AD Hav Antiel - 2 times, last on 2018-04-30
MAJ Hermann - 3 times, last on 2021-01-30
LCM Hubert - 2003-01-16
CM Infamus - 2003-10-07
MAJ Jack Stone - 2002-12-21
GN Jarek La’an - 2015-03-29
MAJ Jaron Kai - 2002-09-11
MAJ Kazraran - 2022-02-22
MAJ KEBLAOMEGA - 2022-01-14
MAJ Keiran - 2005-01-19
MAJ Keiran Laserlight - 2003-03-30
Keller - 2003-02-04
VA Ky Terrak - 2003-04-24
ST Legion Ordo - 2023-06-01
SL Linoge - 2003-02-03
VA Locke Setzer - 2003-07-18
LT LouisdeFuines - 2020-11-29
CM LPhoenix - 2 times, last on 2023-05-20
GN Mark Schueler - 2017-06-15
LCM Marlin - 2005-05-07
GN Master - 2003-06-13
Mayk Wolverine - 2002-12-07
CM Michael LeRoy - 2016-05-25
COL Moagim Daar - 2004-10-15
COL Mosh - 2005-01-29
LCM Nico Avenger - 2003-10-23
MAJ Nolij - 2014-06-11
LT Nurgas Hui - 2003-06-29
HA Pete Mitchell - 2 times, last on 2018-06-06
COL Phalk Sturm - 2 times, last on 2020-12-01
FA Pickled Yoda - 2 times, last on 2014-04-22
HA Plif - 2014-06-08
LC Rando - 3 times, last on 2020-09-17
CPT Ras Kronar - 2003-05-26
MAJ RedTaz - 2021-09-26
MAJ Sarn Erec - 2003-06-12
LC Savageaz - 2005-01-18
CM Sergeyli - 2009-08-21
CM Serin Jansj - 2005-03-13
LCM Sev'rance Tann - 2003-10-31
LC SkyShadow - 2020-06-22
CPT SL8c8 - 2019-06-12
LC Spade - 2003-03-03
LC Strahd - 2003-01-12
COL Styles - 2003-06-21
COL TheBlackxRanger - 2 times, last on 2023-09-29
LC Thorn - 2003-03-29
MAJ Titus - 2003-01-30
CPT TK-6686 - 2005-02-08
CM TK-9780 - 2005-04-18
CPT Von Predator - 2004-10-31
FA Von Reinthaler - 2003-11-13
CPT Wap Eal - 2003-01-23
LCM Wilq Fastclaw - 2003-12-01
MAJ Wolve Excelsior Berkana - 2 times, last on 2023-05-16
COL Wraithdog - 2014-06-22
COL Zeth Durron - 2010-05-19
Required patches
----------------
* none


Installation instructions
--------------------------
1] Double click the .EHM file, the EH Battle Launcher will install the battle
2] Check the Misc folder in your TIE95 one for additional material like patches, sounds etc.
3] Press the TIE Fighter button on the EHBL to start the game
4] Create a new pilot and fly the first battle


THESE LEVELS ARE NOT MADE, DISTRIBUTED, OR SUPPORTED BY LUCASARTS ENTERTAINMENT COMPANY.
ELEMENTS TM & (c) LUCASARTS ENTERTAINMENT COMPANY.

Emperor's Hammer Battle Center - http://battles.tiecorps.org
------------------------------------------------------------
Corrected by Project Phoenix (Dec 7, 1999)
- Added file Readme.txt
by CA:FC/AD Danrik/CA-1/SSSD Sov
- All animated briefings quite redone
- A little thing added in debriefing #6..:P (26/07/00)
by CA:TAC/VD Striker/CA-3/SSSD Sov